Snort
This section will cover Snort3.
Table of Contents
- Introduction
- IDS and IPS Theory
- Snort Basics
- Snort Sniffer Mode
- Logger Mode
- NIDS Mode
- Reading PCAP Files
- Snort Rules
- Rule Headers
- Rule Actions
- Protocols
- IP Addresses
- Port Numbers
- Direction
- Rule Options
- msg
- sid
- reference
- rev
- content
- dsize
- Rule Headers
- Example Rules
Introduction
Snort is an open-source, rule-based Network Intrusion Detection System (NIDS) and Network Intrusion Prevention System (NIPS).
https://www.snort.org/
https://docs.snort.org/
The following are some capabilities of Snort:
- Live traffic analysis
- Attack and probe detection
- Packet logging
- Protocol analysis
- Real-time alerting
Snort has 3 main modes:
- Sniffer Mode - Read IP packets and output them to the console.
- Packet Logger Mode - Log all IP packets (inbound and outbound) from the network.
- NIDS (and NIPS) Mode - Log/drop packets that are deemed malicious according to user-defined rules.
IDS and IPS Theory
An Intrusion Detection System (IDS) is a passive monitoring solution for detecting potential malicious activities or patterns, abnormal incidents, policy violations, and more.
There are 2 main types of IDS systems:
| Type | Description |
|---|---|
| Network Intrusion Detection System (NIDS) | Monitors the traffic flow from in the network. The aim is to investigate the traffic on the entire subnet and create alert if a malicious signature is identified. |
| Host-based Intrusion Detection System (HIDS) | Monitors the traffic flow on a single endpoint. The aim is to investigate traffic on a particular device and create an alert if a malicious signature is identified. |
An Intrusion Prevention System (IPS) is an actively prevents potential malicious activities or patterns, abnormal incidents, policy violations, and more. It is responsible for stopping/preventing/terminating the suspicious event as soon as it has been detected.
There are 4 main types of IPS systems:
| Type | Description |
|---|---|
| Network Intrusion Prevent System (NIPS) | Monitors the traffic flow in the network and terminate any malicious connections if detected. |
| Behaviour-based Intrusion Prevention System/Network Behaviour Analysis (NBA) | Monitors the traffic flow in the network. It requires a training period (also known as "baselining") to learn normal traffic patterns to differentiate between legitimate and malicious traffic. |
| Wireless Intrusion Prevention System (WIPS) | Monitors traffic flows from a wireless network and terminate any malicious connections if detected. |
| Host-based Intrusion Prevention System (HIPS) | Monitors traffic flows from on a single endpoint and terminate any malicious connections if detected. |
The differences between an IDS and IPS is that an IDS only alerts on potential malicious activity, requiring human action while an IPS is able to alert and respond to potential malicious activity, potentially not requiring human action.
An IDS/IPS can use 3 main detection techniques:
- Signature-based - Relies on rules that identify specific patterns of known malicious behaviour.
- Behaviour-based - Identifies threats by comparing known/normal with unknown/abnormal behaviours. This can help identify new threats with new patterns.
- Policy-based - Compares detected activities with system configuration and security policies. This technique helps to detect policy violations.
Snort Basics
Snort can use different configuration files and user-defined rules. The rules and configuration files can be found in the /etc/snort directory.
Before using Snort, we can test it using the -T option.
snort -c /path/to/snort.conf -T
Command breakdown:
-c /path/to/snort.conf- Specify the Snort configuration file to use.-T- Specify to perform a self-test of the configuration file.
Other useful options we can use are -V to display version information and -q (quiet mode) to prevent snort from displaying the default banner and initial information about the setup.
If we are using multiple options, we can combine them like in the following.
sudo snort -de
The above command is the equivalent to using -d -e.
Sniffer Mode
The following are some useful options that can be used in Sniffer mode.
| Option | Descriptiopn |
|---|---|
| -v | Verbose. Display the TCP/IP output in the console. |
| -d | Display the packet data (payload). |
| -e | Display the link-layer (TCP/IP/UDP/ICMP) headers. |
| -X | Display the full packet details in hex. |
| -i | Used to specify a specific network interface to sniff/listen on. |
To use Snort to listen on a specific network interface, we can use the following command.
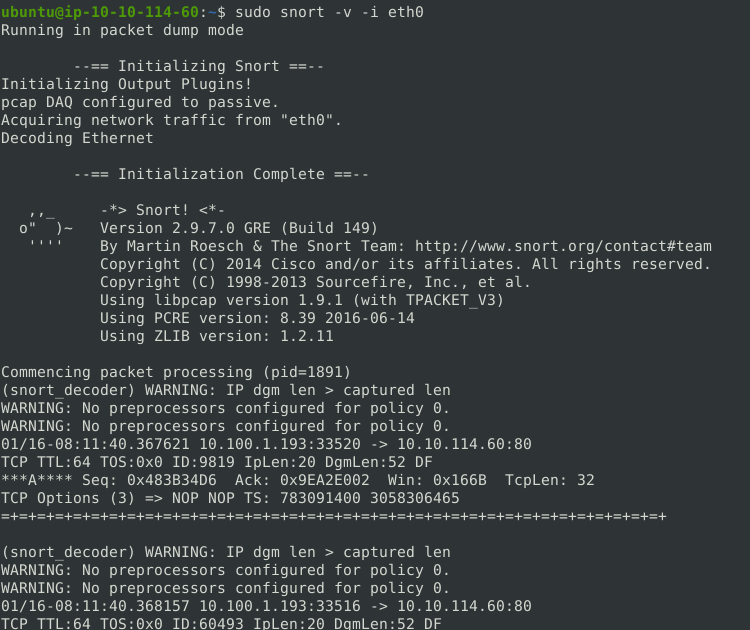
sudo snort -v -i <interface>
Command breakdown:
-v- Verbose mode.-i <interface>- Specify the interface to listen on.
An example will be where the interface to listen on is eth0:
sudo snort -v -i eth0
Note: To view the interface names on Linux, we can use either ifconfig on older systems or ipconfig on newer systems.
To stop Snort, we can simply use CTRL + C. Once stopped, Snort will provide a summary of the captured packets.
To dump (display) the packet data in the console, we can use the -d option. Optionally, we can specify an interface to listen on using the -i option if we have multiple interfaces.
sudo snort -d

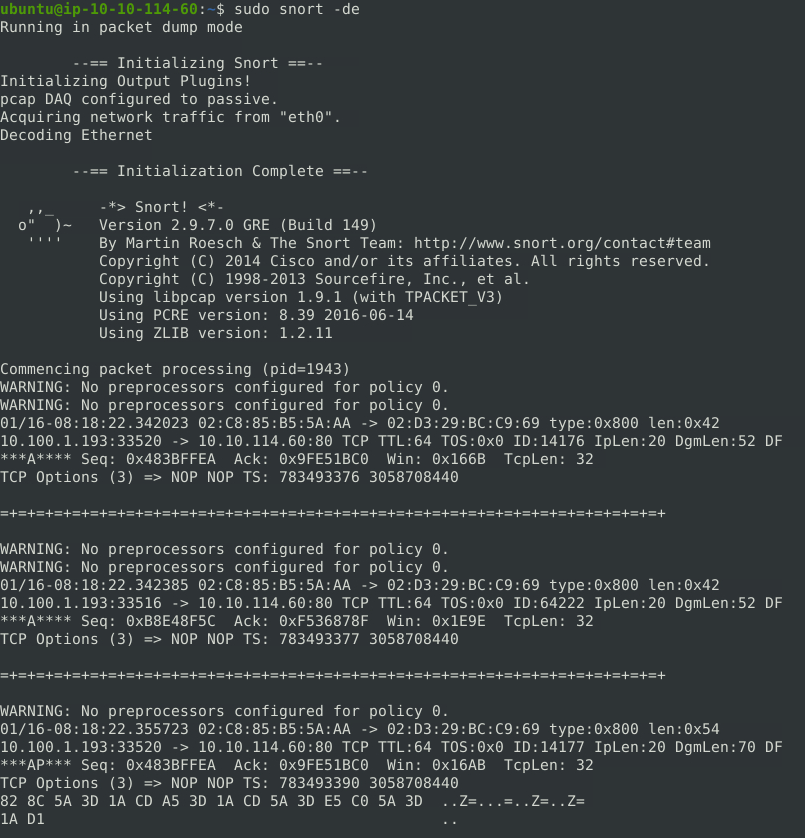
To dump the packet data and link-layer headers, we can use the -d and -e options.
sudo snort -de
Command breakdown:
-d- Display packet data.-e- Display link-layer headers.
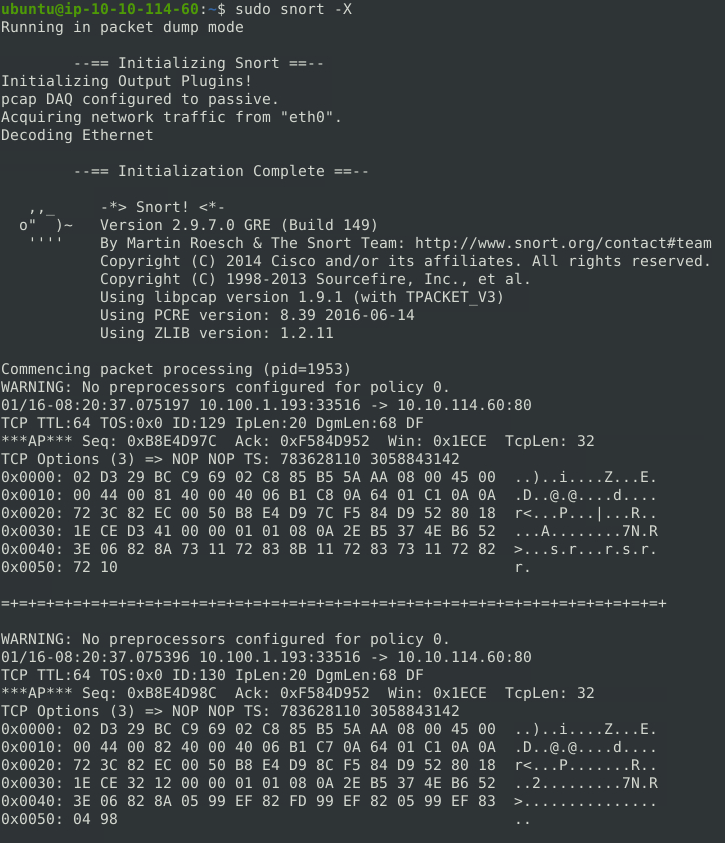
To dump full packet information, we can use the -X option.
sudo snort -X
Logger Mode
Sniffed packets can be save to a file using logger mode. The following table will list some options that can be used in Logger mode.
| Option | Description |
|---|---|
| -l | Specify the directory to save the logs to. By default, packets will be dumped as tcpdump format and saved to the /var/log/snort directory. |
| -K ASSCII | Log packets in ASCII format. |
| -r | Specify to read from an existing log. |
| -n | Specify the number of packets to process or read. Snort will stop after reading the specified number of packets. |
To log packets, we can use the -l option and specify the directory (and optionally file) to save the log to.
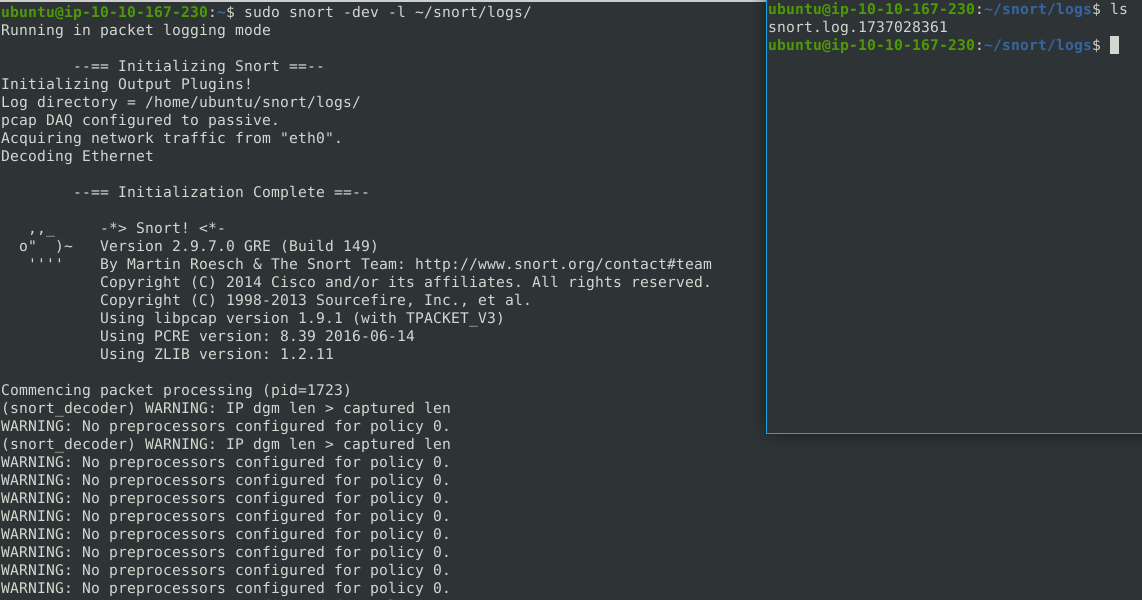
sudo snort -dev -l /path/to/save/log/
Command breakdown:
-dev- Dump packet data (-d), display link-layer headers (-e), and verbose (-v).-l /path/to/save/log/- Specify the path to save the output.
Note that we may need to change the owner of the log file using the sudo chown <username> snort.log command.
An example:
sudo snort -dev -l ~/snort/logs/
To log packets in the ASCII format, we can use the -K option.
sudo snort -d -e -v -K ASCII -l /path/to/save/logs
Command breakdown:
-d- Specify the dump packet data.-e- Specify to display link-layer headers.-v- Verbose mode.-K ASCII- Specify to output the packet data in ASCII format.-l /path/to/save/logs- Specify the path to save the log to.
An example:
sudo snort -d -e -v -K ASCII -l ~/snort/logs/

The logs saved will be saved in ASCII format and categorised according to the IP addresses and the protocols.
To read logs in binary format, we can use the -r option and specify the path to the log file.
sudo snort -r /path/to/snort.log
An example:
sudo snort -r snort/logs/snort.log1737029381
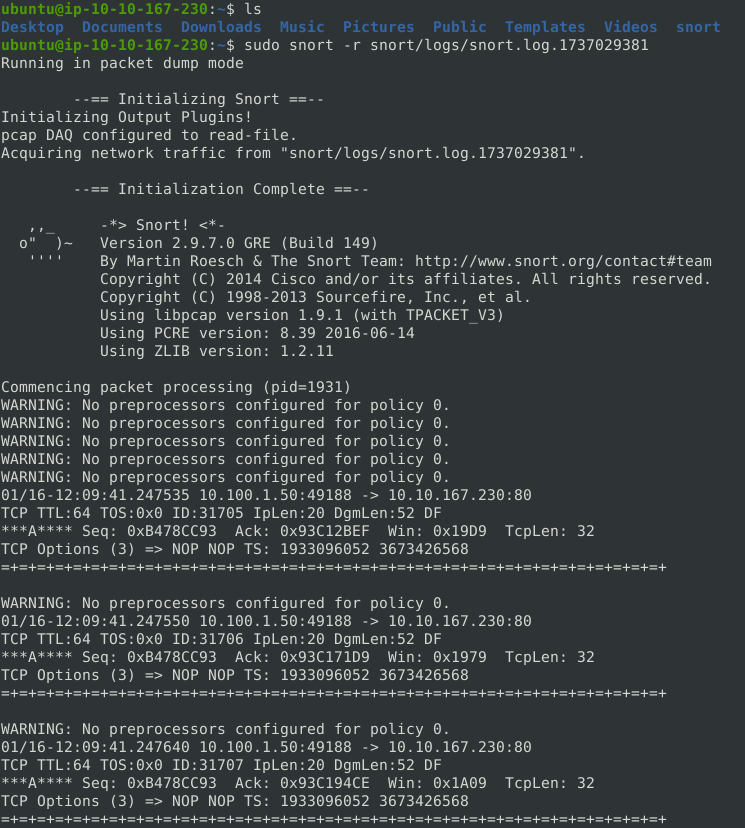
Note that if the log file is created in ASCII using the -K ASCII option, Snort will not read them. The binary files can also be opened in other applications such as Wireshark.
We can also use Berkeley Packet Filters (BPF) using the -r option to filter for specific packets.
sudo snort -r snort.log tcp
The above command will display all TCP packets.
To view a specified number of packets, we can use the -n option and specify the number of packets to display.
sudo snort -r /path/to/snort.log -n 10
Command breakdown:
-r /path/to/snort.log- Specify to read from a log file.-n 10- Display the first 10 entries.
NIDS Mode
Snort can be run as a Network Intrusion Detection System (NIDS). It uses pre-defined rules and configuration to monitor and detect malicious traffic. The rules can be found in the /etc/snort/rules/ directory.
The following table will list some options that can be used in NIDS mode.
| Option | Description |
|---|---|
| -c | Specify the configuration file to use. |
| -T | Test the configuration file. |
| -N | Disable logging (logger mode). |
| -D | Background mode. Runs in the background. |
| -A | Alert modes. There are 5 options - full, fast, console, cmg, none. |
| -l | Specify the location to save the logs to. By default, it will be saved to the /var/log/snort directory. |
Sniffing and logging mode will be semi-passive in this mode. It is also possible to sniff and log traffic in this mode using the options.
Before running NIDS mode, we will need to test our configuration file. We use the -c and -T options.
sudo snort -c /path/to/snort.conf -T
Once validated, we can start NIDS mode using the -c option and specify additional options such as -d to dump the packet data, -e to view link-layer headers, -v for verbose, or -N to disable logging. Disabling logging will not create any log files.
sudo snort -d -e -v -c /path/to/snort.conf
To run Snort in the background, we can use the -D option.
sudo snort -dev -c /path/to/snort.conf -D
Command breakdown:
-d- Dump packet data.-e- Display link-layer headers.-v- Verbose mode.-c /path/to/snort.conf- Specify the path to the Snort configuration file to use.-D- Run in the background.
To use different alert modes, we can use the -A option. There are 5 alert modes:
- full - Full alert mode. Provides all possible information about the alert.
- fast - Fast alert mode. Provides the alert message, timestamp, source and destination IP address, and port numbers.
- console - Provides fast style alerts to the console.
- cmg - Provides basic header details with payload in hex and text format.
- none - Disable alerting.
An example will be where we want to view the IDS alerts in the console.
sudo snort -c /path/to/snort.conf -A console

To view basic headers of the IDS alerts, we can use the -A cmg option.
sudo snort -c /etc/snort/snort.conf -A cmg

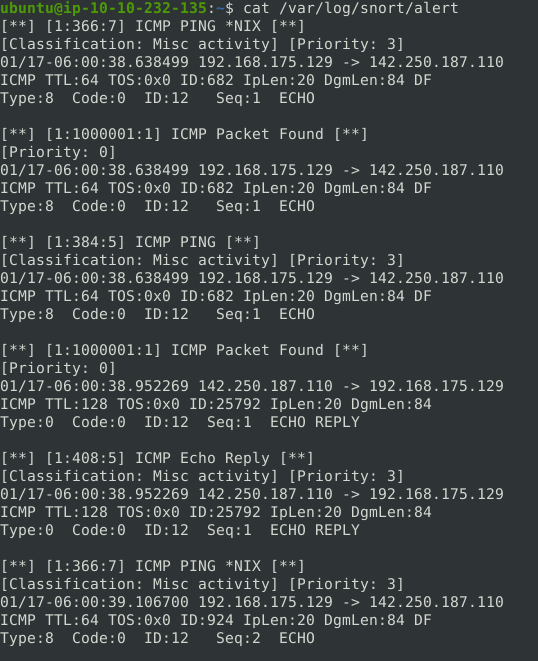
To save the alerts to a file, we can use the -A option with either full or fast. The alerts will be saved to an alarm file. By default, the file will be saved to the /var/log/snort/ directory. To specify the directory, we can use the -l option.
sudo snort -c /etc/snort/snort.conf -A full -l /path/to/save/logs/
Command breakdown:
-c /etc/snort/snort.conf- Specify the configuration file to use.-A full- Specify the alert mode.-l /path/to/save/logs/- Specify the directory to save the logs to.
It is also possible to run Snort only with the rules and no configuration file by specifying the path to the rules with the -c option. However, this will provide less performance.
To use IPS mode, we can use the -Q and --daq afpacket options and specify an interface to listen on for traffic with the -i option.
sudo snort -c /path/to/snort.conf -q -Q --daq afpacket -i eth0:eth1 -A full
Command breakdown:
-c /path/to/snort.conf- Specify the configuration file to use.-q- Quiet mode. Does not show initial banner and status report.-Q- Enable inline mode operation.--daq afpacket- Specify the packet acquisition module (pcap by default).-i eth0:eth1- Specify the interfaces to listen on.-A full- Specify the alert mode.
Reading PCAP Files
Snort can also be used to investigate PCAP files using its rules and configuration. The following table will list some options that can be used.
| Option | Description |
|---|---|
| -r | Specify the file to read from. |
| --pcap-show | Display the PCAP name on the console when processing it. |
| --pcap-list=" " | Read the specified PCAP files (separated by a space). |
To read a PCAP file using our rules and configuration, we can use the -c and -r options while specifying the required files. Additionally, we can use the -A option to specify the log mode.
sudo snort -c /path/to/snort.conf -r <pcap-file>.pcap -A console -q
Command breakdown:
-c /path/to/snort.conf- Specify the configuration file to use.-r <pcap-file>.pcap- Specify the PCAP file to read from.-A console- Set the log mode.-q- Quiet mode. Does not show the initial banner and summary.
To process multiple PCAP files at the same time, we can specify them using the --pcap-list= option.
sudo snort -c /etc/snort/snort.conf --pcap-list="pcap1.pcap pcap2.pcap" -A console -q
Command breakdown:
-c /path/to/snort.conf- Specify the configuration file to use.--pcap-list="pcap1.pcap pcap2.pcap"- Specify the PCAP files to read from.-A console- Set the log mode.-q- Quiet mode. Does not show the initial banner and summary.
To display which PCAP files the alerts were from, we can use the --pcap-show option.
sudo snort -c /etc/snort/snort.conf --pcap-list="pcap1.pcap pcap2.pcap" -A console -q --pcap-show
Command breakdown:
-c /path/to/snort.conf- Specify the configuration file to use.--pcap-list="pcap1.pcap pcap2.pcap"- Specify the PCAP files to read from.-A console- Set the log mode.-q- Quiet mode. Does not show the initial banner and summary.--pcap-show- Display which PCAP files the alerts are from.
Snort Rules
Snort uses rules to detect and flag packets. We can create our own rules or fine-tune existing rulesets to our needs.
https://docs.snort.org/
The rules can be split into 2 parts - Rule Header and Rule Options.
When creating a Snort rule, we will need to specify the following:
- Action
- Protocol
- Source IP Address and Port
- Direction
- Destination IP Address and Port
Optionally, we can specify other relevant information such as:
- Message to display when the rule matches
- References
- SID
- Rule revision (version)
The following is an example of a Snort rule.
alert icmp any 344 <> any 123 (msg:"ICMP Packet Detected";reference:CVE,2025-1701;sid:100001;rev1;)
Rules created locally should be save to the .rules file. To use multiple rules, we can modify it in the configuration file or use the --rule-path option and specify the directory where all the rules file are saved to.
Rule Headers
This section will cover some of the different rule headers that can be used when creating a Snort rule.
The following is the Rule Header from the Snort rule example:
alert icmp any 344 <> any 123

The following table displays the different parts of the rule header and their values.
| Rule Header | Value |
|---|---|
| Rule Actions | alert |
| Protocol Type | icmp |
| any | Source IP Address |
| 344 | Source Port |
<> | Direction |
| any | Destination IP Address |
| 123 | Destination Port |
We can see that the rule will return an alert if there are any ICMP packets from any source IP address with the source port of 344 going to any destination IP address with the destination port of 344 and vice versa (<>).
The following rule headers will be covered:
- Rule Actions
- Protocols
- IP Addresses
- Port Numbers
- Direction
Rule Actions
The rule actions tells Snort how matching packets should be handled.
https://docs.snort.org/rules/headers/actions
There are five basic actions.
| Action | Description |
|---|---|
| alert | Generate an alert on the current packet if matched. |
| block | Block the current packet and all subsequent packets in the flow. |
| drop | Drop the current packet. |
| log | Log the current packet. |
| pass | Mark the current packet as passed. |
There are also 3 types of "active responses". These perform an action if the packet is detected.
| Action | Description |
|---|---|
| react | Send a response to the client and terminate the session. |
| reject | Terminate the session with TCP reset or ICMP unreachable. |
| rewrite | Overwrite the packet contents based on a "replace" option in the rules. |
Examples:
alert icmp (msg:"ICMP Packet Found"; sid:1;)
block http (msg:"Block this packet and subsequent ones"; sid:2;)
reject tcp (msg:"Reject all TCP packets"; sid:3;)
Protocols
The protocol field tells Snort what type of protocol a given rule should look at.
https://docs.snort.org/rules/headers/protocols
The following are some supported rules:
- ip
- icmp
- tcp
- udp
A rule can only have one protocol set. The above protocols looks at layer 3 (ip and icmp) and layer 4 (tcp and udp). It is also possible to specify application layer (layer 7) protocols such as HTTP, SMTP, FTP, and more.
Note that when matching using application layer protocols, the service detected must match in the traffic for the rule to be considered a match.
Examples:
alert http any any -> any 80 (msg:"Alert HTTP";sid:100001;rev1;)
block ftp any any <> any any (msg:"Block FTP";sid:100002;rev1;)
alert udp any 53 -> any any (msg:"DNS Detected";sid:100003;rev1;)
IP Addresses
IP addresses in the rule header tells Snort what source and destination IP addresses a given rule should apply to.
https://docs.snort.org/rules/headers/ips
A rule will only match if the source and destination IP address of a packet matches the IP addresses set in the rule.
IP addresses can be declared using one of the following ways:
- As a single IP address or with an a CIDR block (e.g.,
192.168.1.1,192.168.2.0/24). - As a variable defined in the Snort configuration that specifies a network address or a set of network addresses (e.g.
$ITNET,$HOME_NET, etc.) - Using the keyword
any. This means match any IP address. - A list of IP addresses, variables, and/or ranges using square brackets and separated using commas (e.g.,
[192.168.1.0/24,172.16.1.1,10.1.0.0/16])
The exclamation mark (!) operator can also be used to tell Snort to match any IP address except the ones listed.
Examples:
alert tcp 192.168.1.1 any -> 10.0.0.0/8 443 (msg:"Alert TCP Traffic")
log udp $ITNET any <> $DMZ any
block tcp ![192.168.1.0/24,192.168.10.0/24] any -> [10.1.0.0/16,10.2.0.0/16] 443
Port Numbers
Port numbers in the rule header tells Snort to apply a given rule to traffic sent to or from a specified source and destination port.
https://docs.snort.org/rules/headers/ports
Port numbers can be declared using the following methods:
- Using the
anykeyword. This means match all ports. - As a static port (e.g., 80, 443, 445, etc.).
- As a variable defined in the Snort configuration that specifies a port or set of ports (e.g.,
$WEB_PORTS,$FILEPORTS). - A list of static ports, variables, and/or port ranges enclosed in square backets and separated by commas (e.g.,
[1:1024,8080,22312,$WEB_PORTS])
Note that if a service rule option is declared (e.g. serivce:http), Snort will match all packets that has the specified service (HTTP in this example) even if the source or destination port does is not specified.
The exclamation mark (!) operator can also be used to tell Snort to match any ports except the ones listed.
Example:
log tcp any any -> 10.1.0.0/16 1:1024 (msg:"Common port range";)
alert udp any 53 -> 192.168.1.1 any
log tcp any :1024 -> any 500: (msg:"1 to 1024 to 500 to 65535";)
Direction
Direction operators are used to indicate the direction of the traffic that the rule should apply to.
https://docs.snort.org/rules/headers/directions
There are two valid operators:
->- Source to destination<>- Bidirectional
Examples:
alert icmp any any <> any any (msg:"ICMP Detected";)
log http 10.0.0.0/8 any -> 192.168.1.33 any
log tcp $DMZ 80 -> any any
Rule Options
This section will cover some of the rule options that can be used when creating a Snort rule.
The following is the Rule Options from the Snort rule example:
(msg:"ICMP Packet Detected";reference:CVE,2025-1701;sid:100001;rev1;)
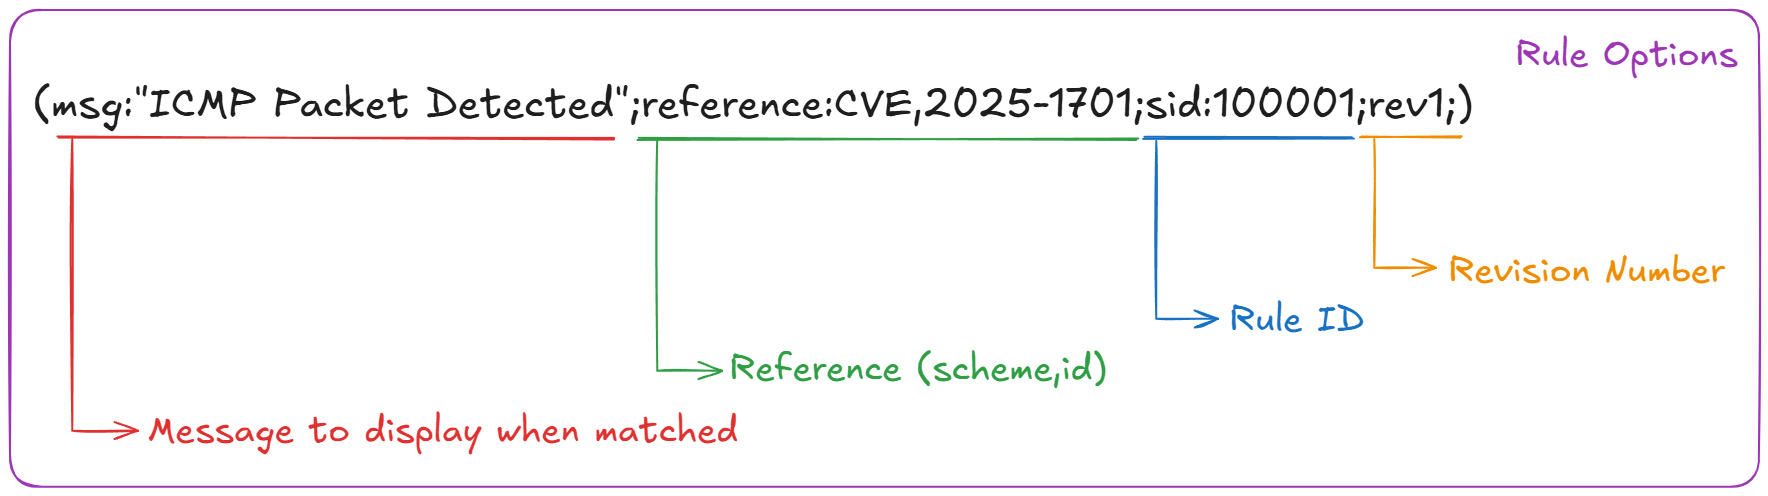
The following table will display the different rule options and their description and values.
| Rule Option | Description | Value |
|---|---|---|
| msg | The message to display if the rule matches. | "ICMP Packet Detected" |
| reference | Additional information in the form of URL or CVE that is relevant to the rule. Uses scheme,id. | CVE,2025-1701 |
| sid | A unique value that identifies a Snort rule. | 100001 |
| rev | The rule revision number. It should be used with the sid and be incremented by one each time a change is made. | 1 |
There are 4 main categories of rule options in Snort:
- General Rule Options - Provides additional context for a given rule.
- Payload Rule Options - Set payload-specific criteria.
- Non-Payload Rule Options - Set non-payload specific criteria.
- Post-Detection - Set actions to take on a given packet if the rule matches.
The following rule options will be covered:
- msg
- reference
- sid
- rev
msg
The msg option is used to add a message that will be displayed when a rule matches.
https://docs.snort.org/rules/options/general/msg
The message should be descriptive and should summarised the rule's purpose as best practices. The message should be enclosed in double quotes (" "). Note that if a semi-colon (;) is required, it should be escaped with a backslash (\;).
The following is the format for the msg option:
msg:"message here";
Examples:
alert tcp any any <> any any (msg:"TCP Alert";)
block tcp any any -> 10.1.0.0/16 8080 (msg:"Malicious Download";)
reference
The reference option is used to provide additional context to the rule in the form of links or CVE ID.
https://docs.snort.org/rules/options/general/reference
There are multiple schemes that Snort knows by default. The two common ones are cve and url. The ID will be the CVE number or URL, depending on the scheme used.
The following is the format for the reference option:
reference:scheme,id;
Examples:
alert udp any any -> 10.0.0.0/8 3123 (msg:"UDP Alert";reference:cve,2025-1234;)
alert tcp any any -> any any (msg:"TCP Alert";reference:url,www.gohspace.com)
sid
The sid keyword is a unique identifier given to a rule.
https://docs.snort.org/rules/options/general/sid
The SID should a numeric value that must be unique to the rule. The SID helps to quickly identify a rule if a alert is generated.
Snort reserves the SID values 0-999999 as these are used in distribution. Therefore, any user created rules or local rules should use a SID that starts from 1000000 as best practice.
The following is the format for the sid option:
sid:signature_id;
Examples:
alert tcp any any <> any any (msg:"tcp alert";sid:1000001;)
alert udp any any -> any any (msg:"udp alert";sid:330123;)
rev
The rev keyword is a unique identifier that identifies the revision number of a rule.
https://docs.snort.org/rules/options/general/rev
The revision number should start at 1 and be incremented if any changes are made to a rule. By default, the revision number will be set to 1 if not specified.
The following is the format for the rev option:
rev:revision;
Examples:
alert tcp any any <> any any (msg:"tcp alert";sid:1000001;rev:1;)
alert udp any any -> any any (msg:"udp alert";sid:330123;rev:23;)
content
The content keyword is a payload detection rule option. It is used to perform basic pattern matching against the packet data.
https://docs.snort.org/rules/options/payload/content
The content option is able to match ASCII strings, hex bytes, or a mix of both. Note that when matching hex bytes, it must be enclosed in the pipe (|) character.
Note that certain reserved characters such as semi-colon (;), backslash (\), and double quotes (") may need to be escaped with a backslash or encoded in hex.
Modifiers such as fast_pattern, nocase, within, distance, offset, and depth are written alongside the content string, separated by commas.
Format:
content:"content_string";
Examples:
alert tcp any any <> any any (msg:"Failed FTP Login";content:"530";)
alert tcp any any <> any any (msg:"FTP root login";content:"User root",nocase;)
alert udp any any <> any any (msg:"ASCII and hex";content:"AC|03 04|";)
dsize
The dsize keyword is a payload detection rule option. It is able to look for a specific payload size in the packet.
https://docs.snort.org/rules/options/payload/dsize
The dsize option is able to look for payload sizes that is equal to, less than, equal or lesser than, greater than, equal or great than, or a range. The valid dsize number range is 0-65535. Note that it only applies to the payload portion of a packet.
The following are some operators that can be used:
| Operator | Description |
|---|---|
<> | Specify the exclusive range to check. |
<=> | Specify the inclusive range to check. |
< | Lesser than. |
<= | Lesser than or equal to. |
> | Greater than. |
=> | Greater than or equal to. |
= | Equal to. |
! | Not equal to. |
Format for single value and range value comparisons respectively:
dsize:[<|>|=|!|<=|>=]size;
dsize:min_size{<>|<=>}max_size;
Examples:
alert tcp any any <> any any (msg:"Size Check";dsize:<500;)
alert tcp any any <> any any (dsize:300<>500;)
alert tcp any any <> any any (dsize:>10000;)
Example Rules
This section will display some example rules and their use cases.
Purpose: Detect all TCP port 80 traffic. Description: This rule will detect generate an and alert for all TCP traffic with the destination port as 80.
alert tcp any any <> any 80 (msg:"TCP port 80 detected";sid:1000001;rev:1;)
Purpose: Detect all TCP port 21 traffic. Description: This rule will detect and generate an alert for all TCP traffic with the destination port as 21.
alert tcp any any <> any 21 (msg:"TCP port 21 detected";sid:1000002;rev:1;)
Purpose: Detect successful FTP login attempts. Description: This rule will detect and generate an alert for all successful FTP login attempts.
alert tcp any any <> any 21 (msg:"Successful FTP Login";content:"230";sid:1000003;rev:1;)
Purpose: Detect FTP login attempts with a valid username but no password entered. Description: This rule will detect and generate an alert for all FTP login attempts where the username is valid but no password was entered.
alert tcp any any <> any 21 (msg:"FTP valid user";content:"331";sid:1000004;rev:1;)
Purpose: Detect FTP login attempts using the "Administrator" username but no password entered. Description: This rule will detect and generate an alert for all FTP login attempts using the Administrator username but no password has been entered.
alert tcp any any <> any 21 (msg:"FTP Administrator username";content:"331";content:"Administrator",nocase;sid:1000005;rev:1;)
Purpose: Detect PNG files in the packet data. Description: This rule will detect and generate an alert if a packet contains a PNG file.
alert tcp any any <> any any (msg:"PNG Found";content:"PNG",nocase;sid:1000006;rev:1;)
Purpose: Detect torrent metafile. Description: This rule will detect and generate an alert if a torrent metafile is found.
alert tcp any any <> any any (msg:"Torrent Download";content:".torrent";sid:1000007;rev:1;)
Purpose: Detect any payloads containing \IPC$.
Description: This rule will detect and generate an alert if the string \IPC$ is found in the packet data.
alert tcp any any <> any any (msg:"IPC found in payload";content:"\\IPC$";sid:1000008;rev:1;)
Purpose: Detect packet payloads between 770 and 855 bytes. Description: This rule will detect and generate an alert if the packet data is between 770 and 855 bytes.
alert tcp any any <> any any (msg:"Payload size match";dsize:770<>855;sid:1000009;rev:1;)