Active Directory Enumeration
This section will cover ways to enumerate in Active Directory (AD).
Table of Contents
- Overview
- Initial Enumeration
- Identifying Hosts
- Wireshark
- TCPDump
- Responder
- Fping
- Nmap
- Identifying Users
- Kerbrute
- CrackMapExec
- enum4linux-ng
- Identifying Potential Vulnerabilities
- Identifying Hosts
- Foothold Enumeration
- Identifying Security Controls
- Password Policy
- Windows Defender
- AppLocker
- PowerShell Constrained Language Mode
- LAPS
- Access Control List (ACL)
- Domain Enumeration
- CrackMapExec
- SMBMap
- rpcclient
- Impacket Toolkit
- Windapsearch
- BloodHound
- ActiveDirectory PowerShell Module
- PowerView
- SharpView
- Network Shares
- Auditing
- Creating an AD Snapshot
- PingCastle
- Group3r
- ADRecon
- Identifying Security Controls
Overview
Before starting any enumeration, we will need to ensure that we stay in scope and within the Rules of Engagement (RoE).
The goal is to gather as much information as possible as the more information we gather, the easier it will be to find vulnerabilities, exploits, and findings.
Some information that we are looking for but not limited to are:
| Data Point | Examples |
|---|---|
| IP Space | IP addresses, netblocks assigned or used for internet facing infrastructure, cloud infrastructure, DNS records, etc. |
| Domain Information | Based on IP data, DNS, and site registrations. Who are the administrators for the domain? Are there any items such as email servers, DNS, websites, VPN portals, etc. Are there defences such as SIEMs, IDS/IPS, and firewalls in place? |
| Schema Format | Can we discover the organisation's email accounts, AD usernames, or password policies? |
| Data Disclosure | Are there any confidential information published by accident or unknowingly to the internet? |
| Breach Data | Are there any publicly released credentials, sensitive, or critical information |
Below are some ways that can be used to search for data.
| Resource | Examples |
|---|---|
| ASN/IP Registarars | IANA, ARIN for America, RIPE for Europe, APNIC for Asia, BGP Toolkit. |
| Domain Registrars and DNS | crt.sh, ICANN, manual DNS record queries against well know DNS servers, etc. |
| Social Media | LinkedIn, Instagram, Telegram, new articles, or any relevant information on the organisation. |
| Public-Facing Organisation Websites | Pages such as "About Us" or "Contact Us", or embedded documents. |
| Cloud and Dev Storage Spaces | GitHub, AWS S3 Buckets, Azure Blog storage, Google dorking. |
| Breach Data Sources | HaveIBeenPwned, Dehashed, etc. |
Initial Enumeration
It is common to start an engagement without user credentials or with a low privileged user. Some key data points in an AD environment are the AD users, joined computers, key services, and vulnerable hosts and services.
To start enumeration, we can perform passive identification of any hosts in the network followed by an active method such as performing a Nmap scan against the targets.
Identifying Hosts
To identify hosts, we can use tools such as Wireshark or TCPDump to listen on the network and see what type of traffic we can capture. There are several tools that can be used to identify hosts on a network.
The following will be covered:
- Wireshark
- TCPDump
- Responder
- Fping
- Nmap
Wireshark
We can capture useful information such as ARP, NBNS, and MDNS will provide us with IP addresses and hostnames.

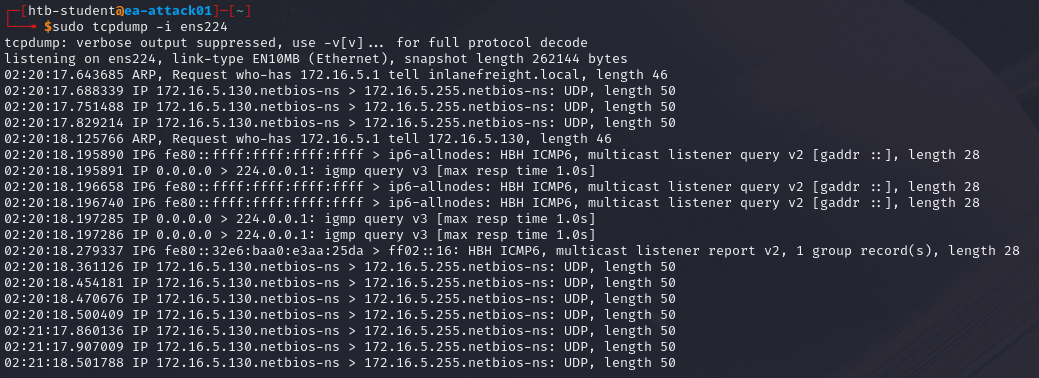
TCPDump
Another example will be using TCPDump to capture traffic.
sudo tcpdump -i <interface>
Command breakdown:
-i <interface>- Specify the interface to listen for traffic.
Responder
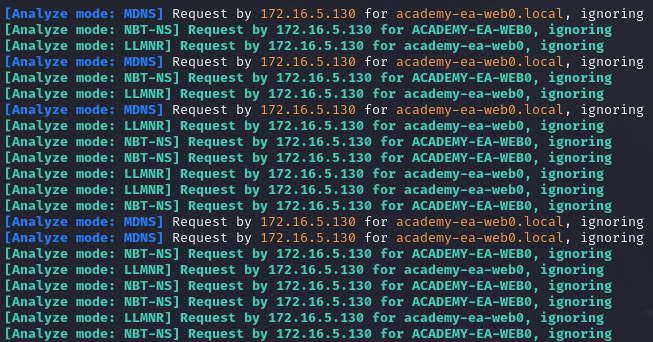
Responder can be used to perform attacks such as LLMNR poisoning or use it in analyse mode. To use Responder in analyse mode, we can use the following command.
sudo responder -I <interface> -A
Command breakdown:
-I <interface>- Specify the interface to listen on.-A- Use analyse mode.
Fping
Fping allows us to perform an ICMP sweep (ping sweep) of the subnet.
fping -asgq <Network Address>/<CIDR>
Command breakdown:
-a- Show alive targets.-s- Print the stats to the screen.-g- Generate a target list from the CIDR network.-q- Do not show per-target results.<Network Address>- Specify the network address to scan.<CIDR>- Specify the CIDR notation.
An example:
fprint -asgp 192.168.1.0/24
Nmap
Once we have a list of active targets, we can use Nmap to perform enumeration on the specified hosts.
An example:
nmap -A -iL targets.txt -oN results.txt
Command breakdown:
-A- Perform OS and version detection, script scanning, and traceroute.-iL targets.txt- Specify the list of targets.-oN results.txt- Specify the file to output the results to.
Alternatively, we can scan individual targets.
nmap -A <Target IP>
Once we have identified the version of the service, we can look for potential vulnerabilities and exploits to gain more access to the target.
For more information on using Nmap, view the Nmap notes.
Identifying Users
We can enumerate for users to gain initial access or perform lateral movement or pivoting. There are many ways of obtaining usernames and credentials such as dumping the SAM database, obtaining the NTLM hash of a user, etc.
There are several tools that we can use to perform username enumeration.
The following will be covered:
- Kerbrute
- CrackMapExec
- enum4linux-ng
Kerbrute
Kerbrute to perform domain account enumeration. kerbrute takes advantages of Kerberos pre-authentication failures as they will often not trigger logs or alerts.
We can also use wordlists alongside kerbrute to have a higher chance of success. An example of such wordlist is https://github.com/insidetrust/statistically-likely-usernames.
To use Kerbrute, we will need to perform some initial setup using the following commands.
git clone https://github.com/ropnop/kerbrute.git
cd kerbrute
sudo make all
The above commands will clone the Kerbrute repository and compile the binaries to use.
Once compiled, we can use the following command.
./kerbrute_linux_amd64 userenum -d <domain> --dc <Domain Controller IP> <username wordlist> -o valid_users.txt
Command breakdown:
userenum- Specify to enumerate for users.-d <domain>- Specify the target domain.--dc <Domain Controller IP>- Specify the DC IP address.<username wordlist>- Specify the username wordlist to use.-o valid_users.txt- Output the results to the specified file.
An example:
./kerbrute_linux_amd64 userenum -d mycorp.lan --dc 10.10.120.1 users.txt -o results.txt
Once we have a list of valid users, we can perform attacks such as brute forcing or password spraying to get valid credentials.
CrackMapExec
To enumerate for usernames, we can use the following command.
crackmapexec smb <Target IP> --users
crackmapexec smb <Target IP> -u <username> -p "<password>" --users
Command breakdown:
smb- Specify to use the SMB protocol.<Target IP>- Specify the target IP address.-u <username>- Specify the username to use for authentication.-p "<password>"- Specify the password to use for authentication.--users- Specify to enumerate for usernames.
enum4linux-ng
We can also use the following command to enumerate for users.
enum4linux -U <Target IP> | grep "user:" | cut -f2 -d"[" | cut -f1 -d"]"
Command breakdown:
-U- Specify to enumerate for users.<Target IP>- Specify the target IP address.| grep- Pipe the output to Grep."user:"- Search for the stringuser:.| cut -f2 -d"["- Pipe the output tocutand select the second field with the[delimiter.| cut -f2 -d"]"- Pipe the output tocutand select the first field with the]delimiter.
Identifying Potential Vulnerabilities
The local system account NT AUTHORITY\SYSTEM is a built-in account and has the highest level of access in Windows and is used to run most Windows services.
A SYSTEM account on a domain-joined host will be able to enumerate AD by impersonating the computer account, which is essentially another kind of user account. Having SYSTEM-level access within a domain environment is nearly equivalent to having a domain user account.
Below are some methods to obtain SYSTEM-level access, including but not limited to:
- Remote Windows exploits such as MS08-067 or MS17-010.
- Abusing a service running in the context of the
SYSTEMaccount, or abusing the service accountSeImpersonateprivileges usingJuciy Potato. - Local privilege escalation in Windows.
- Gaining admin access on a domain-joined host with a local account and using Psexec to launch a SYSTEM cmd window.
By gaining SYSTEM-level access on a domain-joined host, we can perform tasks such as, but not limited to:
- Enumerate the domain using built-in tools or offensive tools such as BloodHound and PowerView.
- Perform Kerberoasting/ASREPRoasting attacks.
- Run tools such as Inveigh to gather Net-NTLMv2 hashes or perform SMB relay attacks.
- Perform token impersonation to hijack a privileged domain user account.
- Carry out ACL attacks.
Foothold Enumeration
After we have gain initial access to the target, we can start to enumerate for other information such as security controls in place on the target.
Identifying Security Controls
Some security controls that we should enumerate are, but not limited to:
- Password Policy
- Windows Defender
- AppLocker
- PowerShell Constrained Language Mode
- LAPS
- Access Control Lists (ACL)
Password Policy
On Windows, we can use tools such as the built-in net command to enumerate for the password policy.
net accounts
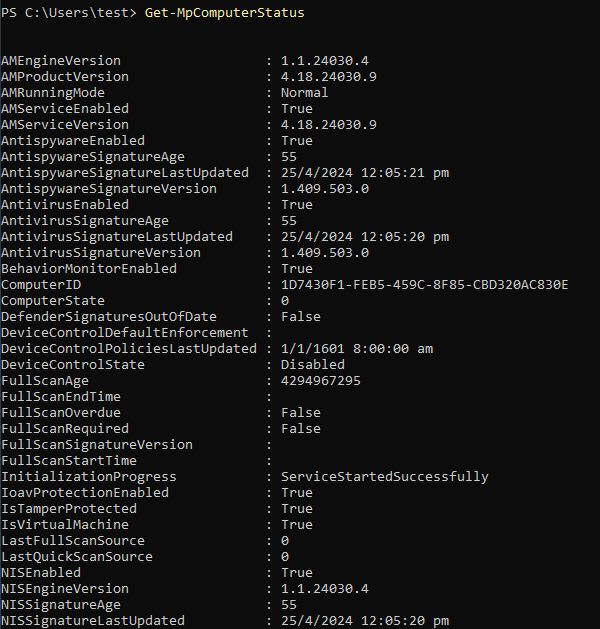
Windows Defender
In PowerShell, we can use the following command to obtain information on Windows Defender.
Get-MpComputerStatus
AppLocker
AppLocker is an application whitelist of approved software applications or executables that are allowed to be present and run on a system. We can use the following command to view details on AppLocker.
Get-AppLockerPolicy -Effective | select -ExpandProperty RuleCollections
The above command will retrieve the effective AppLocker policy and expand the RuleCollections property from the effective AppLocker policy.
PowerShell Constrained Language Mode
PowerShell Constrained Language Mode locks down many of the features needed to use PowerShell effectively such as blocking COM objects, only allowing approved .NET types, XAML-based workflows, and more.
We can use the following command to verify if it is enabled.
$ExecutionContext.SessionState.LanguageMode
![]()
LAPS
The Microsoft Local Administrator Password Solution (LAPS) is used to randomised and rotate local administrator passwords on Windows hosts and prevent lateral movement.
We can use a tool called LAPSToolkit that can be downloaded from GitHub using the following link.
https://github.com/leoloobeek/LAPSToolkit
Once downloaded onto the target, we can use the Import-Module .\LAPSToolkit.ps1 to import it.
Once imported, we can use the following command to find delegated groups
FindLAPSDelegatedGroups
We can also use the following command to check the rights on each computer with LAPS enabled for any groups with read access and users with "All Extended Rights".
Find-AdmPwdExtendedRights
We can also use the following command to search for computers with LAPS enabled and see when the password will expire, and even the randomised passwords in cleartext if our user has access.
Get-LAPSComputers
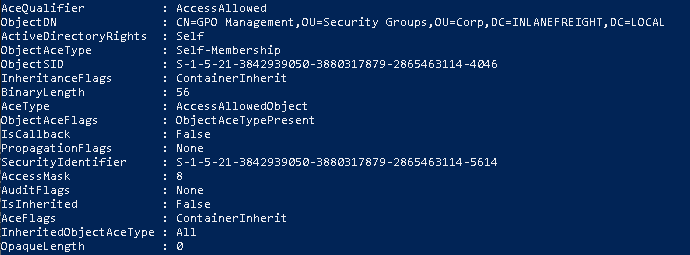
Access Control List (ACL)
We can use tools such as PowerView to enumerate ACLs.
Find-InterestingDomainAcl
We can enumerate ACLs using a specific user. To do this, we will need the SID of the target user to search effectively.
$sid = Convert-NameToSid <username>
We can use the Get-DomainObjectACL command to perform the search.
Get-DomainObjectACL -ResolveGUIDs -Identity * | ? {$_.SecurityIdentifier -eq $sid}
We can create a list of domain users and save it to a file using the following command.
Get-ADUser -Filter * | Select-Object -ExpandProperty SamAccountName > <output file>
Once we have a list of usernames, we can use a foreach loop with the Get-Acl cmdlet to retrieve ACL information for each domain user found in the <output file>.
foreach($line in [System.IO.File]::ReadLines("C:\path\to\list")) {get-acl "AD:\$(Get-ADUser $line)" | Where-Object {$_.SecurityReference -match '<domain>\\<username>'}}
An example:
foreach($line in [System.IO.File]::ReadLines("C:\users\superuser\names.txt")) {get-acl "AD:\$(Get-ADUser $line)" | Where-Object {$_.SecurityReference -match 'mycorp\superuser'}}
We can repeat the steps for each user that is interesting to us to gather information.
If we have discovered a group, we can use the following command to check if it is nested in other groups.
Get-DomainGroup -Identity "<group name>" | select memberof
We can use the following to investigate the ACL of a group.
$groupsid = Convert-NameToSid "<group name>"
Get-DomainObjectACL -ResolveGUIDs -Identity * | ? {$_.SecurityIdentifier -eq $groupsid} - Verbose
Domain Enumeration
We can use several tools to enumerate for a wide range of information once we have valid user accounts.
The following will be covered:
- CrackMapExec
- SMBMap
- rpcclient
- Impacket Toolkit
- Windapsearch
- BloodHound
- Network Shares
CrackMapExec
We can use CrackMapExec (CME) with different protocols such as SMB, WinRM, SSH, and more to enumerate an AD environment.
Each protocol has its own set of options which can be viewed using the <protocol> -h options.
crackmapexec <protocol> -h
crackmapexec winrm -h
There are many different options that can be used. The following will be important in section:
-u <username>- Specify the username to use for authentication.-p <password>- Specify the password to use for authentication.<Target IP>- Specify the target IP address.--users- Specify to enumerate domain users.--groups- Specify to enumerate domain groups.--loggedon-users- Enumerate what users are logged on to the target, if any.
This section will use the smb module in CME as examples.
To enumerate for domain users, we can use the --users flag. CME will provide us with information such as badPwdCount which can be useful when perform brute force attacks such as password spraying which can help prevent locking out accounts when attacking.
sudo crackmapexec smb <Target IP> -u <username> -p <password> --users
To enumerate domain groups, we can use the --groups flag.
sudo crackmapexec smb <Target IP> -u <username> -p <password> --groups
To enumerate logged on users, we can use the --loggedon-users flag.
sudo crackmapexec smb <Target IP> -u <username> -p <password> --loggedon-users
To enumerate shares, we can use the --shares flag.
sudo crackmapexec smb <Target IP> -u <username> -p <password> --shares
We can use the spider_plus module to discover any potential sensitive information such as passwords or personal identifiable information (PII).
sudo crackmapexec smb <Target IP> -u <username> -p <password> -M spider_plus --share '<share name>'
SMBMap
SMBMap can be used to enumerate SMB shares. it can gather information such as a listing of shares, permissions, and share contents (if accessible). Once we have access, we can download and upload files and execute commands remotely.
smbmap -u <username> -p <password> -d <domain> -H <Target IP>
To enumerate a specific share, we can use the -R switch with the --dir-only to specify only directories.
smbmap -u <username> -p <password> -d <domain> -H <Target IP> -R '<share>' --dir-only
Command breakdown:
-u <username>- Specify the username to use for authentication.-p <password>- Specify the password to use for authentication.-d <domain>- Specify the target domain.-H <Target IP>- Specify the target IP address.-R '<share>'- Specify the share to enumerate.--dir-only- Only display directories.
rpcclient
rpcclient can be used with the SAMBA protocol via MS-RPC. It can enumerate, add, change, and remove objects from AD. rpcclient uses SMB NULL sessions on the target and can perform authenticated or unauthenticated enumeration.
To connect to the target as an unauthenticated user, we can use the following command.
rpcclient -U "" -N <Target IP>
Once connected, we can use different queries with the Relative Identifier (RID). A RID is represented in hexadecimal and is used in combination with the SID of the domain. We can use the following queries to enumerate with rpcclient.
enumdomusers
enumdomgroups
queryuser <user RID>
querygroup <group RID>
Impacket Toolkit
Impacket is a toolkit that provides us with different scripts that can be used to enumerate, interact, and exploit Windows systems using Python scripts. There are many scripts under Impacket. This section will cover psexec and wmiexec.
Impacket-Psexec
Impacket-Psexec is a clone of the Sysinternals psexec executable that works slightly differently. The tool creates a remote service by uploading a randomly-named executable to the ADMIN$ share on the target.
Once uploaded, it registers the services via RPC and the Windows Service Control Manager. Once established, we can effectively have remote access to the target as the SYSTEM user.
impacket-psexec <domain>/<username>:'<password>'@<Target IP>
Command breakdown:
<domain>- Specify the target domain.<username>- Specify the username to use for authentication.<password>- Specify the password to use for authentication.<Target IP>- Specify the target IP address.
An example:
impacket-psexec mycorp.lan/tuser:'password123'@10.42.0.220
Impacket-wmiexec
Impacket-wmiexec uses a semi-interactive shell where commands are executed through Windows Management Instrumentation (WMI). It does not drop any files onto the target and can generate fewer logs when compared to other scripts.
impacket-wmiexec <domain>/<username>:'<password>'@<Target IP>
Command breakdown:
<domain>- Specify the target domain.<username>- Specify the username to use for authentication.<password>- Specify the password to use for authentication.<Target IP>- Specify the target IP address.
Note that this shell environment is not fully interactive, so each command issued will execute a new cmd.exe from WMI to execute our command. The session is also running as the user specified when attempting to authenticate using the above command.
Windapsearch
Windapsearch is a tool developed in Python that can enumerate users, groups, and computers by utilising LDAP queries.
The following flags will be covered:
--da- Enumerate domain administrator group members.-PU- Find privileged users. This option will perform a recursive search for users with nested group memberships.
To use windapsearch, we can use the following command.
python3 windapsearch.py --dc-ip <Domain Controller IP> -u <username>@<domain> -p <password> --da
We can also use the -PU flag.
python3 windapsearch.py --dc-ip <Domain Controller IP> -u <username>@<domain> -p <password> -PU
BloodHound
BloodHound can be used to create graphical representations or "attack paths" of where a particular user can lead us to.
Tools such as bloodhound-python can be used to gather information that can then be fed into BloodHound to create a visual representation of the AD environment and show us potential attack paths which can be used to achieve our goals.
To use bloodhound-python, we can use the following command.
sudo bloodhound-python -u <username> -p <password> -ns <Target IP> -d <domain> -c all
Command breakdown:
-u <username>- Specify the username to use for authentication.-p <password>- Specify the password to use for authentication.-ns <Target IP>- Specify the name server to use.-d <domain>- Specify the target domain.-c all- Specify to collection method to use. In this example, all.
An example:
sudo bloodhound-python -u myuser -p 'password123' -ns 10.42.0.20 -d mycorp.lan -c all
If we are on a Windows system, we can use SharpHound.
.\SharpHound.exe -c All --zipfilename <file name>
Once completed, we will obtain a couple .json files which can then be zipped and uploaded to BloodHound for analysis.
To ZIP the files, we can use the following command or do it from the file manager GUI.
zip -r <file name>.zip *.json
To start BloodHound, we will need to use sudo neo4j start to start the neo4j service which will be the database. The database can be accessed on http://localhost:7474. The default credentials are neo4j:neo4j.
Once the database has started, we can use the command bloodhound or start it from the GUI to run the application.
To upload files, select "Upload Data" on the top right and select the ZIP file created earlier.
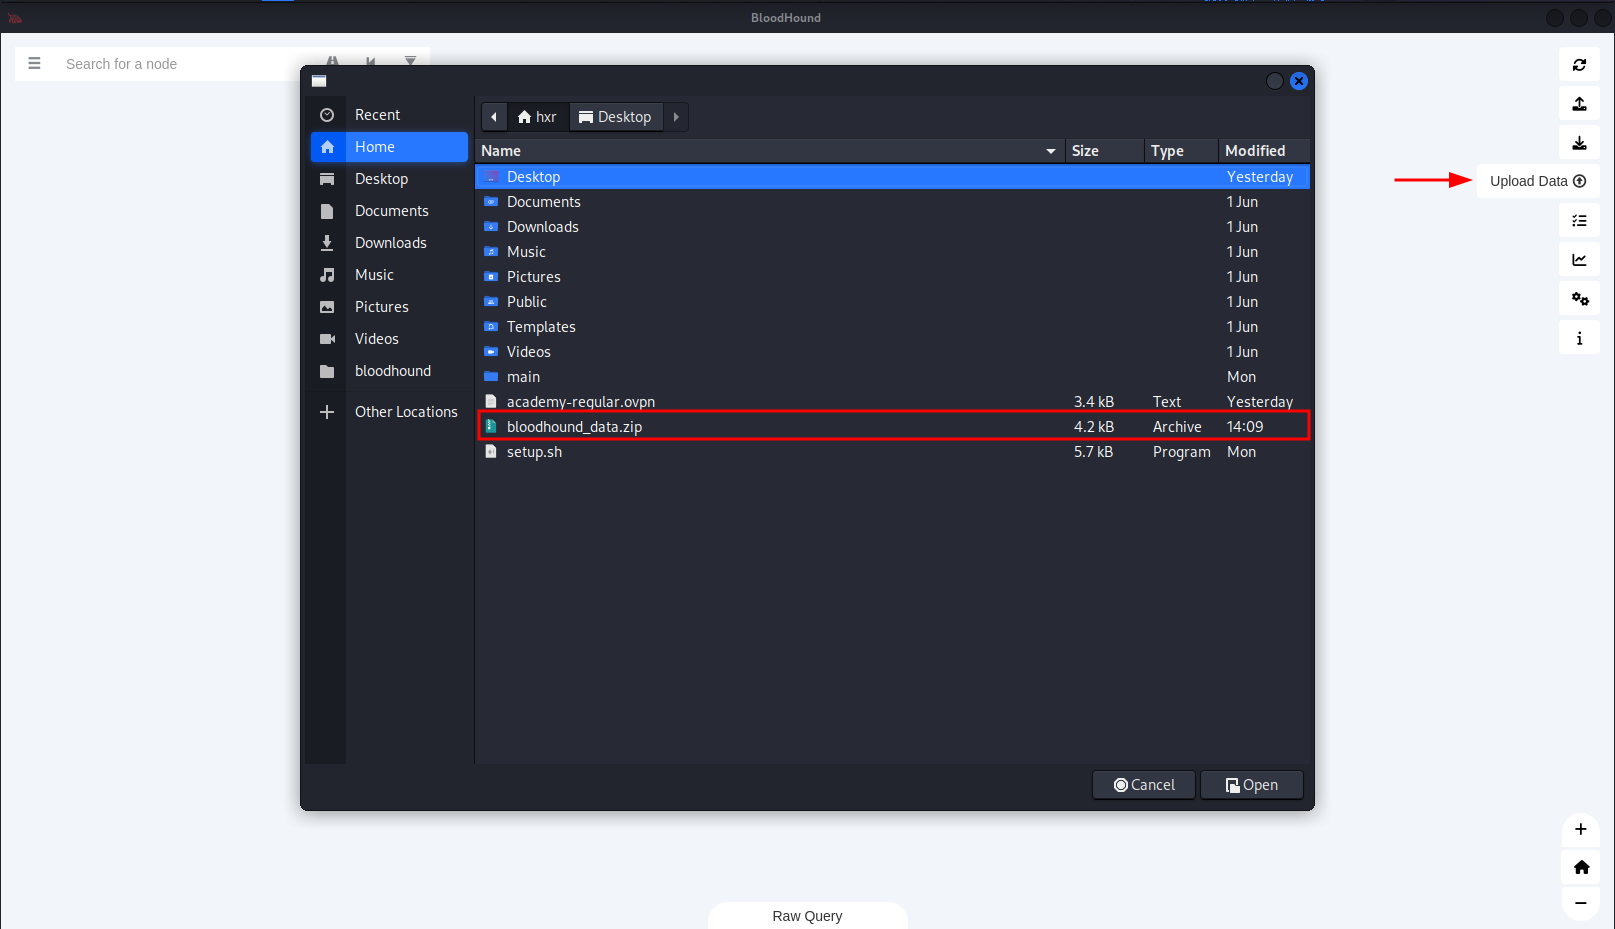
Once uploaded, we can create our own Cypher queries or use the Path Finding queries on the Analysis tab on the left side.
An example will be using the Find Shortest Paths To Domain Admins. This will give us any logical paths it finds through users, groups, hosts, etc., relationships that will give us the potential to escalate to Domain Administrator privileges or equivalent.
ActiveDirectory PowerShell Module
If we are using a Windows machine to attack or have compromised a Windows machine, the ActiveDirectory PowerShell Module is a group of cmdlets for administering an AD environment from the CLI. It can be downloaded from Microsoft's website.
https://learn.microsoft.com/en-us/powershell/module/activedirectory/?view=windowsserver2022-ps
This section will cover the following modules:
- Get-ADDomain
- Get-ADUser
- Get-ADTrust
- Get-ADGroup
- Get-ADGroupMember
To use it, we will need to download it and use the Import-Module command.
Import-Module ActiveDirectory
Once installed, the Get-Module command can be used to view available modules.
To get information on a domain, we can use the following.
Get-ADDomain
The Get-ADUser cmdlet can be used to obtain account information. For example, we can also filter for accounts with ServicePrincipalName property if we performing Kerberoasting.
Get-ADUser -Filter {ServicePrincipalName -ne "$null"} -Properties ServicePrincipalName
The Get-ADTrust cmdlet allows us to verify domain trust relationships. We can determine if they are trusts within our forest or with domains in other forests.
Get-ADTrust -Filter *
The Get-ADGroup cmdlet can be used to display all domain groups. We can use the following command to filter for the name only. We can also use the -Identity option to obtain more detailed information on a specific group.
Get-ADGroup -Filter * | select name
Get-ADGroup -Identity "<group name>"
The Get-ADGroupMember cmdlet can be used to obtain a member listing for the specified group.
Get-ADGroupMember -Identity "<group name>"
PowerView
Another tool that can be used if we managed to gain access to a Windows machine will be PowerView. It is written in PowerShell and allows us to gather information within an AD environment. However, it is no longer supported.
It can be downloaded from GitHub.
https://github.com/PowerShellMafia/PowerSploit/tree/master/Recon
There are many cmdlets that can be used. This section will cover the following:
- Get-DomainUser
- Get-DomainGroupMember
- Get-DomainTrustMapping
- Test-AdminAccess
Once it is installed on the machine, we can use the following command to import it.
Import-Module .\PowerView.ps1
To obtain a domain user information, we can use the following command.
Get-DomainUser -Identity <username> -Domain <domain> | Select-Object -Property name,samaccountname,description,memberof,whencreated,pwdlastset,lastlogontimestamp,accountexpires,admincount,userprincipalname,serviceprincipalname,useraccountcontrol
Alternatively, we can get users with SPNs sets.
Get-DomainUser -SPN -Properties samaccountname,ServicePrincipalName
We can get all users in a domain group by using the Get-ComainGroupMember command.
Get-DomainGroupMember -Identity "<group name>" -Recurse
We can use the Get-DomainTrustMapping to enumerate domain trust relations.
Get-DomainTrustMapping
We can use Test-AdminAccess to test for local admin access on the local or remote machine.
Test-AdminAccess -ComputerName <computer name>
SharpView
SharpView a .NET port of PowerView. It can be downloaded from GitHub.
https://github.com/tevora-threat/SharpView
Once installed onto the target or Windows attack machine that is part of the domain, we can use the -Help flag to view all available options.
To enumerate information from a specific user, we can use the Get-DomainUser command.
.\SharpView.exe Get-DomainUser -Identity <username>
Network Shares
Shares allows a user to store and share files from a centralised location. If the permissions are not set properly, we can gain valuable information from the shares that we have access to.
To enumerate for sensitive information in an AD environment, we can use a tool called Snaffler. It can be downloaded from GitHub.
https://github.com/SnaffCon/Snaffler
The tool can be run from a host that is in a domain or in a domain user context. We can use the following command on both Linux or Windows to use snaffler.
snaffler.exe -s -d <domain> -o <output file> -v data
Command breakdown:
-s- Print the result to the console.-d <domain>- Specify the target domain.-o <output file>- Specify the file to store the results in. This option is not required.-v data- Specify the verbosity level.
Auditing
We can audit a domain using methods and tools such as creating an AD snapshot, using PingCastle, or Group3r.
Creating an AD Snapshot
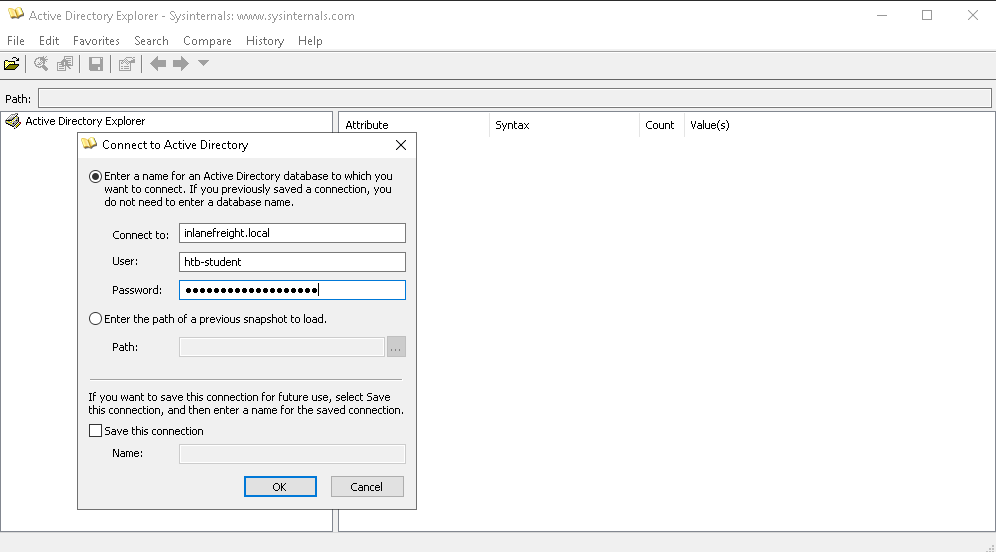
To create a snapshot, we can use Active Directory Explorer which is part of the Sysinternal Suite on Windows.
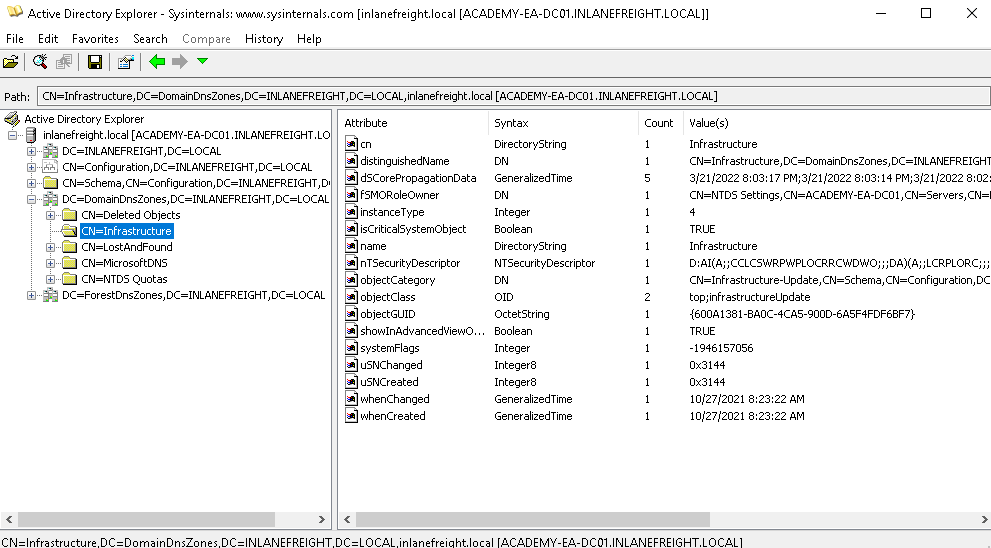
This will allow us to view the AD database and all its objects and attributes without opening items such as dialog boxes or edit permissions.
To start, login with AD Explorer and connect to the target AD environment.
Once done, we can start browsing the AD environment with AD Explorer.
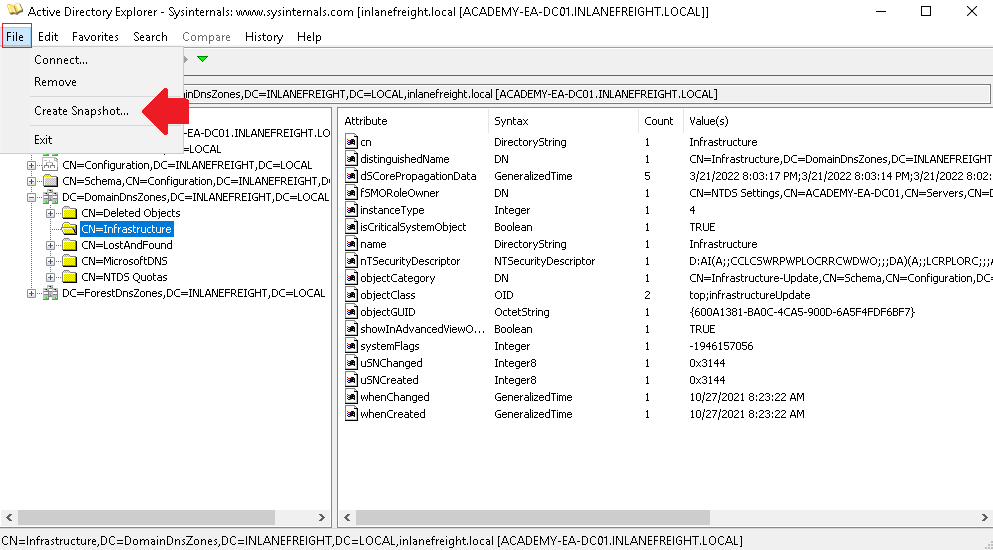
To create the snapshot, navigate to File -> Create Snapshot and enter a name for it. Once done, we can move it offline to perform analysis.
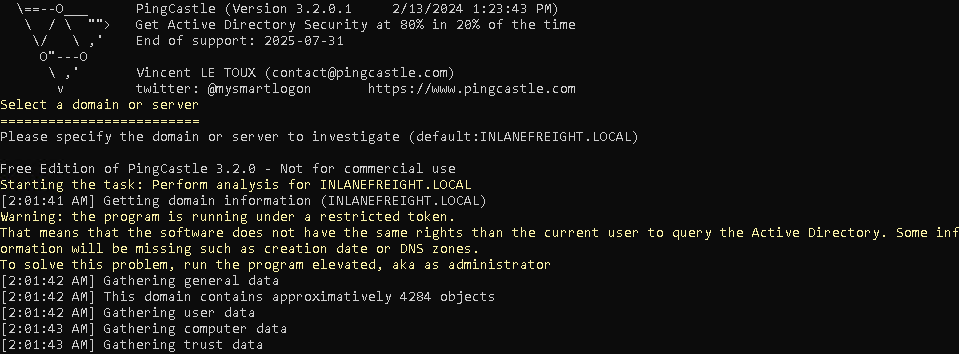
PingCastle
PingCastle can be used to evaluate the security posture of an AD environment and provide a report with graphs and different maps.
To use PingCastle, we can use the following in command prompt in Windows. This will put us into an interactive session.
PingCastle.exe
The default option will be healthcheck. This option will establish a baseline overview for the domain and provide us any information with misconfigurations and vulnerabilities.
Group3r
Group3r can be used to find vulnerabilities in Active Directory associated Group Policy. This tool must be run from a machine and user that is part of a domain. No administrative privileges are required.
We can use the following command to run it in command prompt in Windows.
group3r.exe -f <output file>.log
Command breakdown:
-f <output file>.log- Specify the output file name to save the results to.
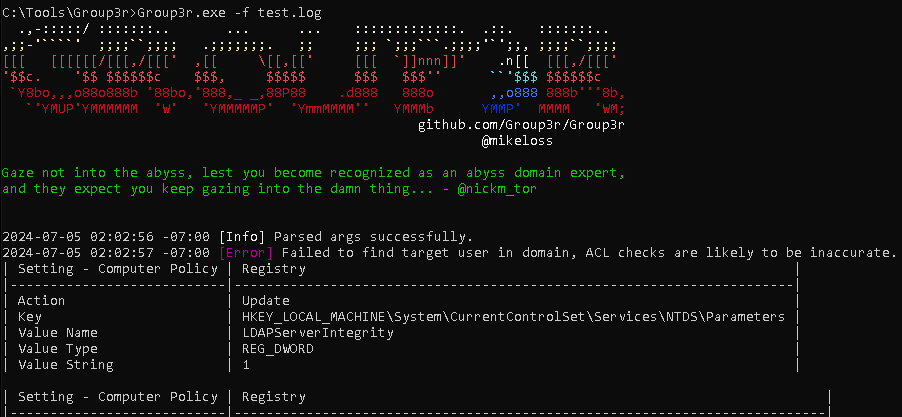
Alternatively, we can use the -s flag to send the results to the terminal.
ADRecon
We can use ADRecon to enumerate a large amount of information which can be used for analysing.
https://github.com/adrecon/ADRecon
We can use the following command in PowerShell.
.\ADRecon.ps1

Once done, it will output the results in HTML and a folder containing .csv files.